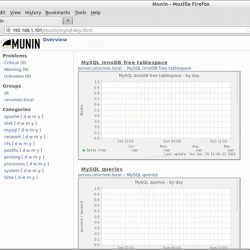
在本教程中,我们将向您展示如何在 Ubuntu 14.04 上安装 Munin。 对于那些不知道的人,Munin 是一个免费的开源网络资源监控工具。 它提供对服务器、交换机、应用程序和服务的监视和警报服务。 Munin 使用 RRDtool 创建可通过 Web 浏览器访问的图形。 此外,Munin 可以配置为在某些服务/应用程序等不工作时发送警报,一旦问题解决,Munin 将自动发送额外的电子邮件警报。
本文假设您至少具备 Linux 的基本知识,知道如何使用 shell,最重要的是,您将网站托管在自己的 VPS 上。 安装非常简单。 我将向您展示在 ubuntu 14.04 服务器上逐步安装 Munin。
先决条件
- 运行以下操作系统之一的服务器:Ubuntu 14.04,以及任何其他基于 Debian 的发行版。
- 建议您使用全新的操作系统安装来防止任何潜在问题。
- 对服务器的 SSH 访问(或者如果您在桌面上,则只需打开终端)。
- 一种
non-root sudo user或访问root user. 我们建议充当non-root sudo user,但是,如果您在充当 root 时不小心,可能会损害您的系统。
在 Ubuntu 14.04 上安装 Munin
步骤 1. 首先,通过运行以下命令确保所有系统包都是最新的 apt-get 终端中的命令。
sudo apt-get update sudo apt-get upgrade
步骤 2. 安装 Apache 可从 Ubuntu 存储库中获得。
apt-get install apache2
步骤 3. 安装 Munin。
使用以下命令安装 Munin 和额外的插件:
apt-get install munin munin-node munin-plugins-extra
步骤 4. 配置 Apache 网络服务器。
接下来,当您请求监控信息时,您将编辑 Munin 的 apache 配置文件以将 apache 指向正确的方向:
mv /etc/munin/apache.conf /etc/munin/apache.conf.bak
编辑’/etc/munin/apache.conf‘ 配置文件并添加以下行:
#nano /etc/munin/apache.conf
<VirtualHost *:80> ServerName munin.your-domain.com ServerAlias www.munin.your-domain.com ServerAdmin [email protected] DocumentRoot "/var/cache/munin/www" DirectoryIndex index.html <Directory "/var/cache/munin/www"> Options Indexes Includes FollowSymLinks MultiViews AllowOverride AuthConfig AuthUserFile /etc/munin/htpasswd AuthName "munin" AuthType Basic Require valid-user Order allow,deny Allow from all </Directory> CustomLog /var/log/apache2/munin.your-domain.com-access.log combined ErrorLog /var/log/apache2/munin.your-domain.com-error.log <Directory "/etc/munin/static"> Require all granted </Directory> <Directory "/usr/lib/munin/cgi"> Options +ExecCGI Require all granted <IfModule mod_fcgid.c> SetHandler fcgid-script </IfModule> <IfModule !mod_fcgid.c> SetHandler cgi-script </IfModule> </Directory> </VirtualHost>
步骤 5. 配置 Munin 服务器。
创建您在 munin.conf 文件并修改所有权以允许 Munin 对其进行写入:
sudo mkdir /var/cache/munin/www/ sudo chown munin:munin -R /var/cache/munin/www
创建原始 Munin 配置文件的备份:
cp /etc/munin/munin.conf /etc/munin/munin.conf.orig
编辑 Munin 配置文件并添加/修改以下行:
#nano /etc/munin/munin.conf dbdir /var/lib/munin htmldir /var/cache/munin/www logdir /var/log/munin rundir /var/run/munin tmpldir /etc/munin/templates includedir /etc/munin/conf.d graph_strategy cron cgiurl_graph /munin-cgi/munin-cgi-graph html_strategy cron [localhost] address 127.0.0.1 use_node_name yes
为 Munin 管理员用户创建密码:
htpasswd -c /etc/munin/htpasswd munin
第 6 步:开始 Apache 和穆宁服务。
service apache2 start service munin-node start
如果一切顺利,请在以下位置打开 Munin https://munin.your-domain.com 使用“munin”作为用户名和之前生成的 Munin 密码作为密码,您将能够访问 Munin 图形和数据。
恭喜! 您已成功安装 Munin。 感谢您使用本教程在 ubuntu 14.04 系统上安装 Munin 服务器监控。 如需其他帮助或有用信息,我们建议您查看 官方主网站.


